My vegetable seedlings popped up quickly this spring, which meant I needed a garden bed — FAST! Check out how I made this cheap & easy L-shaped raised garden bed out of cedar fence pickets. In just a few hours, I had a vegetable garden ready for growing!
Happy Tuesday, friends!
Got a new backyard update for ya today: my L-shaped raised garden bed, completed and growing strong with veggies! Since I’ve been putting some effort into doing more video this year, I have a both video tutorial and a post below about it, so you can pick your poison.
DIY L-Shaped Vegetable Garden Bed
I say “new” because they’re new as of 2018, but in truth, they’ve been in the yard for about two months now. I’ve been scrambling with the deck build and getting the shed underway, but I think it’s probably best to share the garden build before the new veggies — which are starting to grow in, so I need to get a move on with this post!
If you recall from my seedling post, I was in a rush to build some new garden beds in the back yard. I was crazy-surprised how quickly the seeds popped up and were ready to be transplanted. Luckily, I’ve already been through this whole garden bed build experience thanks to the gardenia garden beds I built along the fence a few years ago. My experience from those gave me a few things to keep in mind:
- More 2×4 posts (I used mostly scraps last time, and the 2x4s simply needed a few more to make for better reinforcement spacing along the bed)
- All cedar this time
- Maximize the amount of beds I could build with as little wood as possible (budget-conscious build as always!)
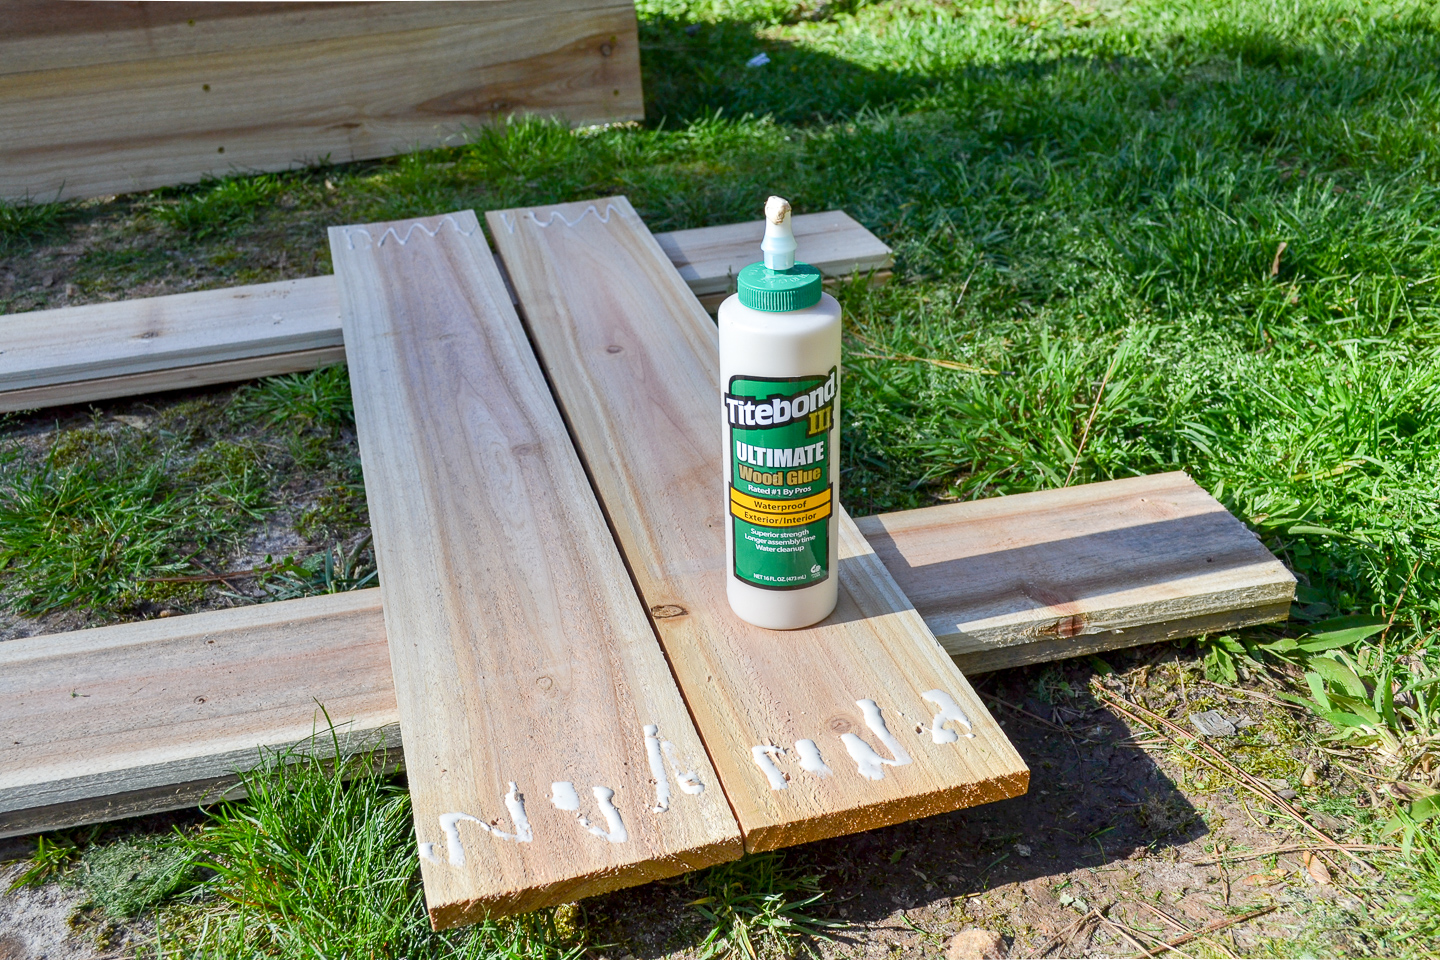
- Use wood glue as well (I didn’t last time, but some outdoor wood glue seemed like another way to keep it solid for as long as possible)
Like last time, I bought dog-eared fence pickets, but went with cedar for a way to change it up. Cedar has natural oils in it that resist rot, so they’re great for an application like this. I also picked up cedar 2x4s and cut all the pieces down.
Wood:
- 14 – cedar fence pickets
- 4 – cedar 2 x 4x (8ft length)
Cuts:
- Cut off the dog-eared parts of each fence picket and line them up to make sure they are the same length (my preferred method that avoids measuring: stack them and tape them together with painter’s tape, then cut them together in a batch)
- Cut 2x4s to 18-inch lengths (roughly 5 per 8-ft board)**
- Each rectangular bed needs 4 full-length cedar picket boards, then 2 more cut in half to create the sides
** You can make these longer if you have to concern yourself with frost or whatever (in Georgia that’s not really a thing I think much about), but I know my friend Kit from DIY Diva cuts hers to 19 inches and lives in freezing cold Michigan, if that helps!
Supplies:
- Wood glue
- Painter’s tape (for cutting)
- Miter saw (I recently upgraded my saw to a bigger and badder one, and I LOVE IT)
- Drill and drill bits (if you have one available, it’s faster to use one drill for pre-drilling, then an impact driver for driving all the screws… they’re often sold together in combo kits so if you don’t have these, I highly recommend them!)
- Exterior wood screws
- Shovel (boy howdy, did I ever do some digging!)
- Landscape fabric
Be sure to pre-drill the boards; they risk splitting if you try to screw into them without!

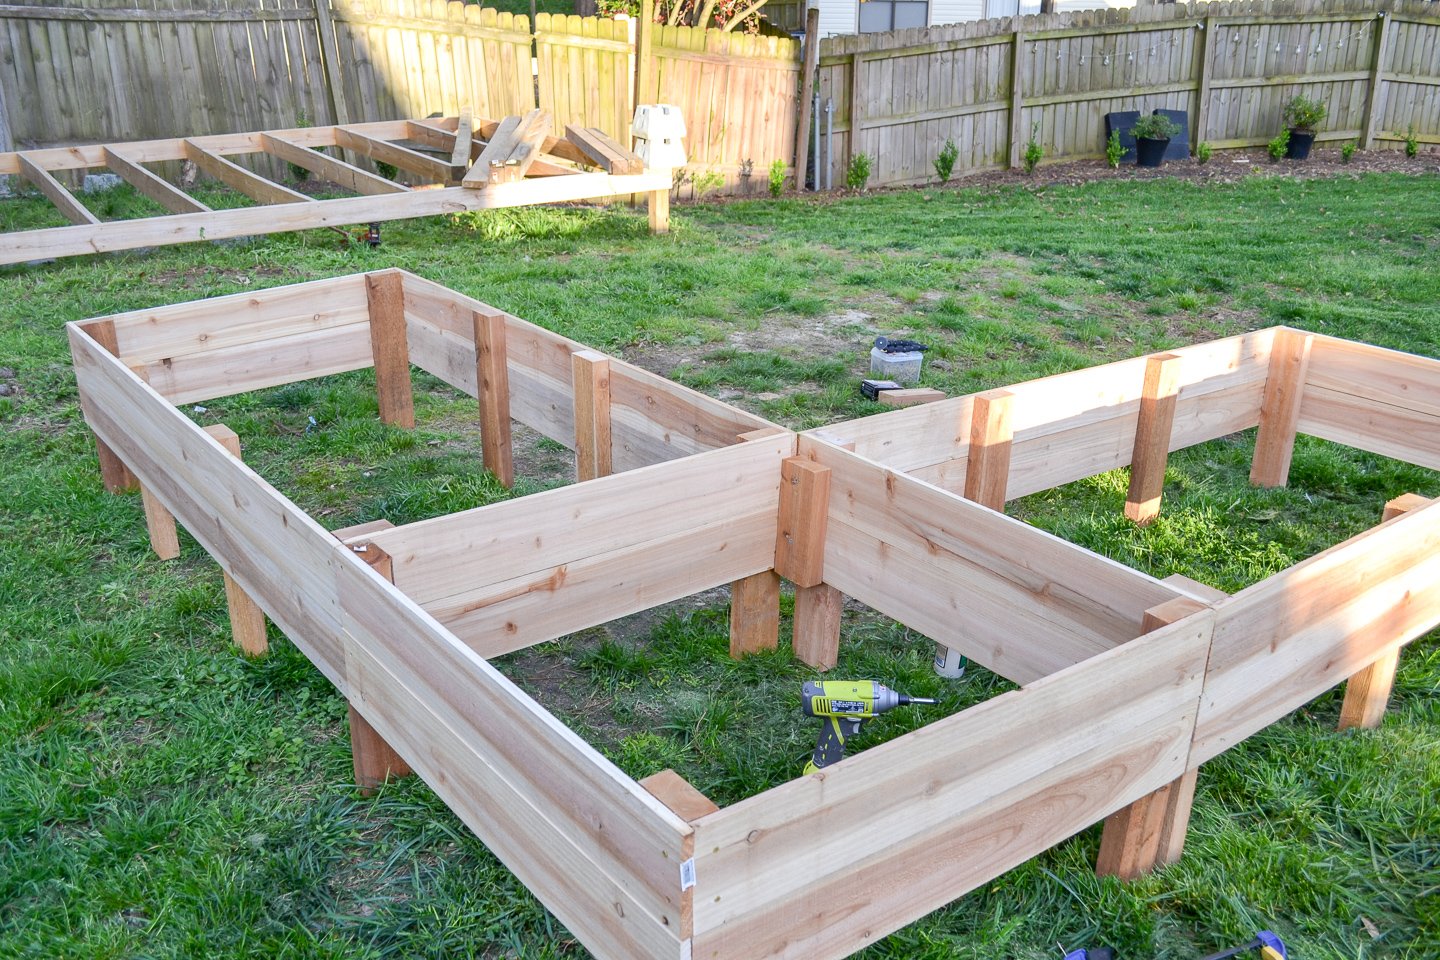
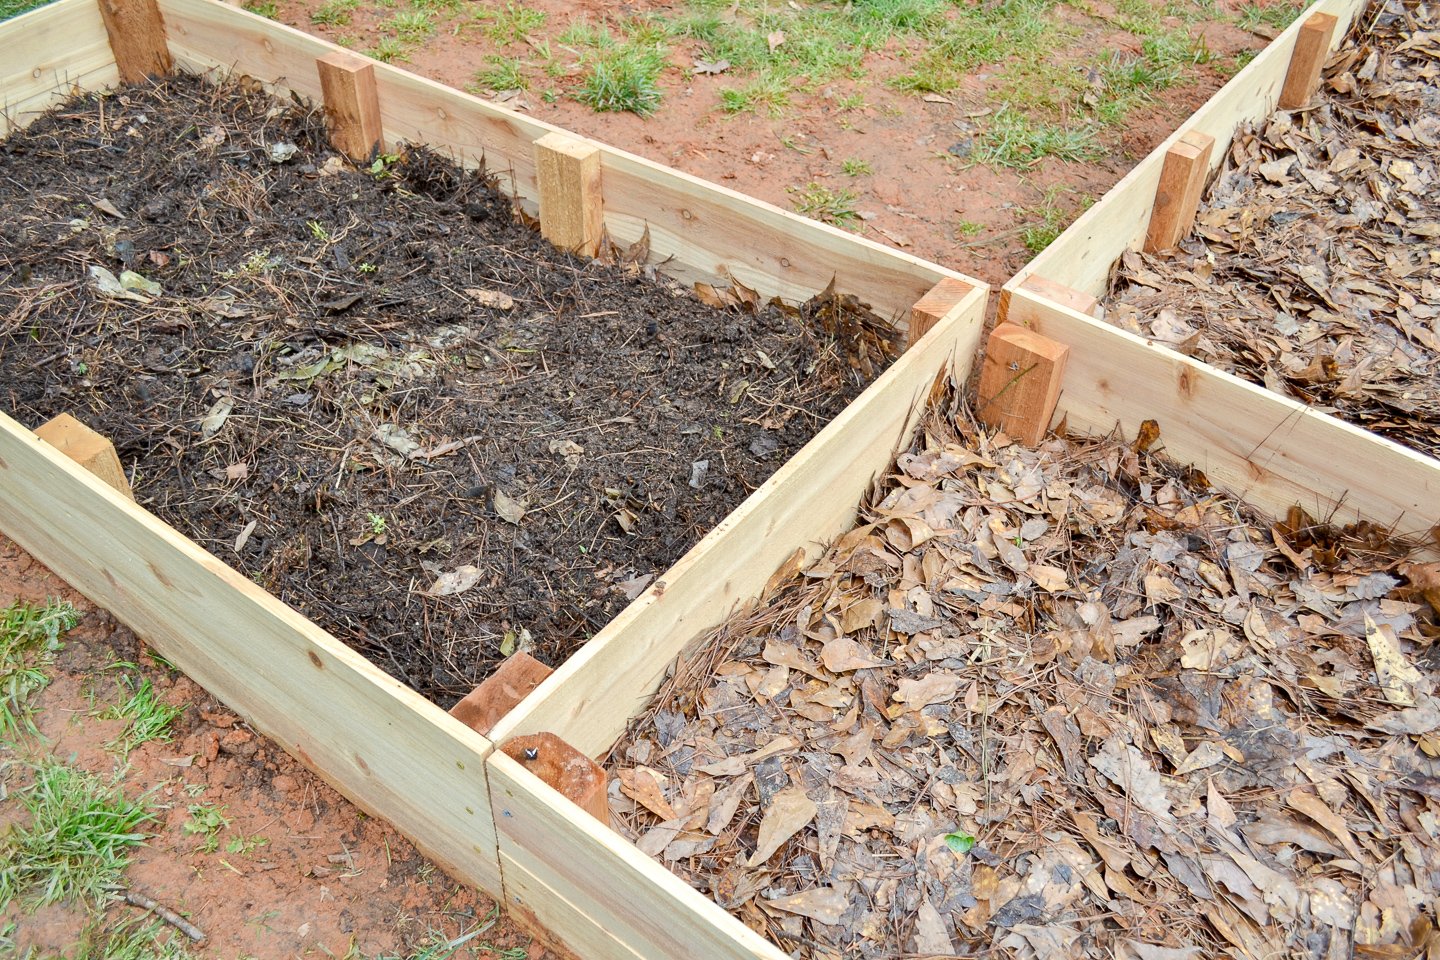
I screwed the sides in panels and eyeballed the spacing of the supports along each longer side (see above for a visual example). Since I was installing on unlevel ground, I used some of the not-yet-installed pieces to create a more level surface for stacking.

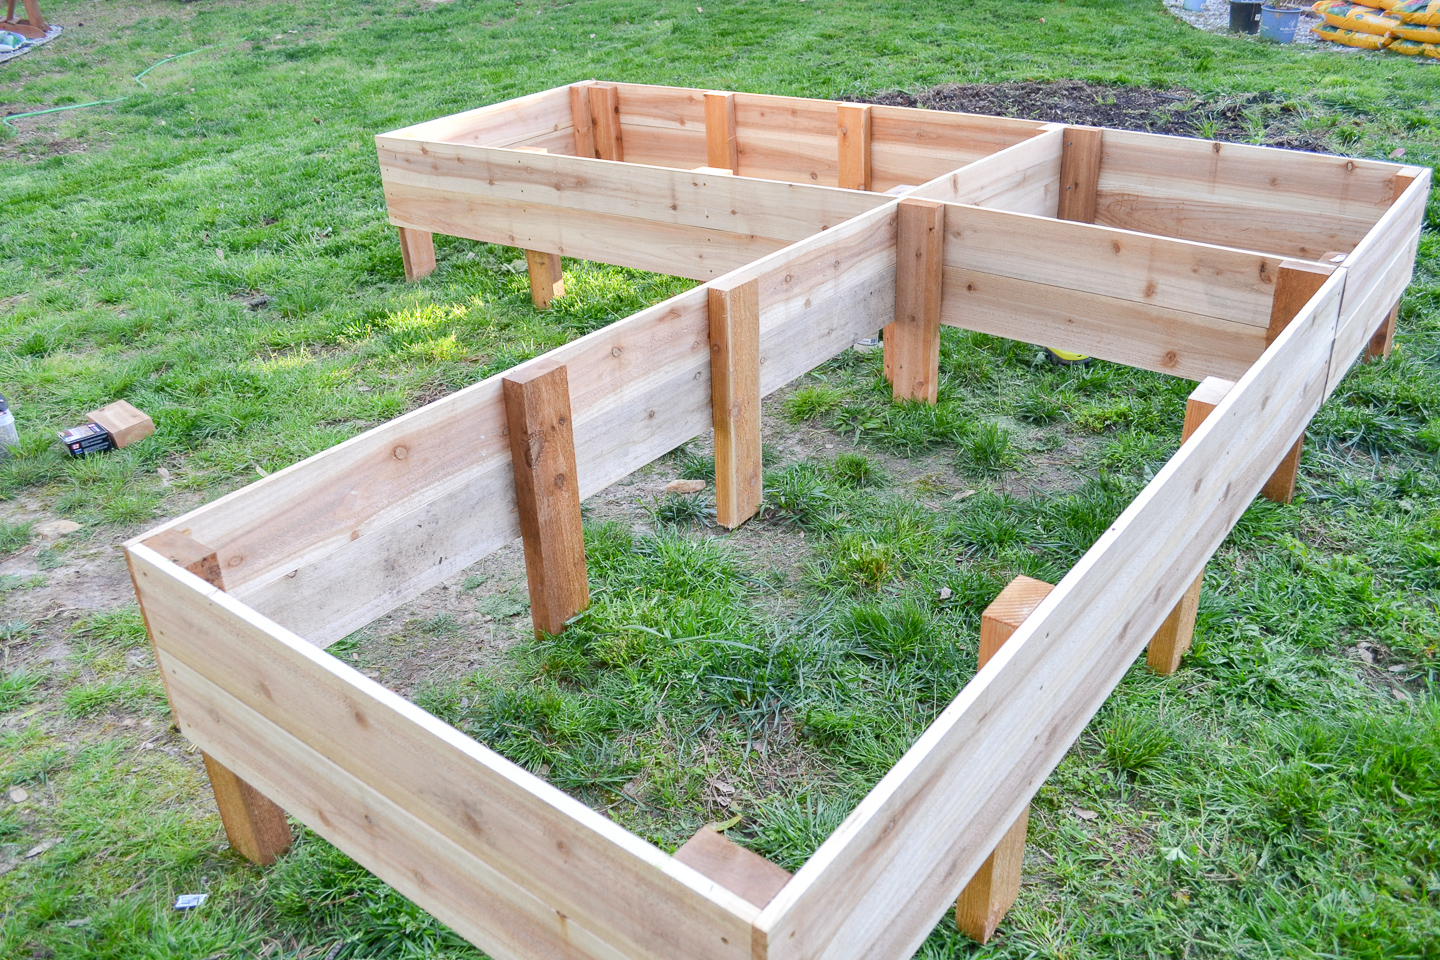
For the corner bed, I didn’t actually build an entire other bed; instead, I used 2 boards, cut each in half, created the corner, and screwed it to the other two beds to form an L.
Once it was all flipped over, it was ready for digging.
A.
LOT.
OF.
DIGGING.
Georgia red clay is no joke. But after wrestling with the shovel for a good while, the bed finally succumbed and sunk into the ground. Then, I added some landscaping fabric to help block weeds from the bottom (a MUST if you have a weed-prone yard like mine).
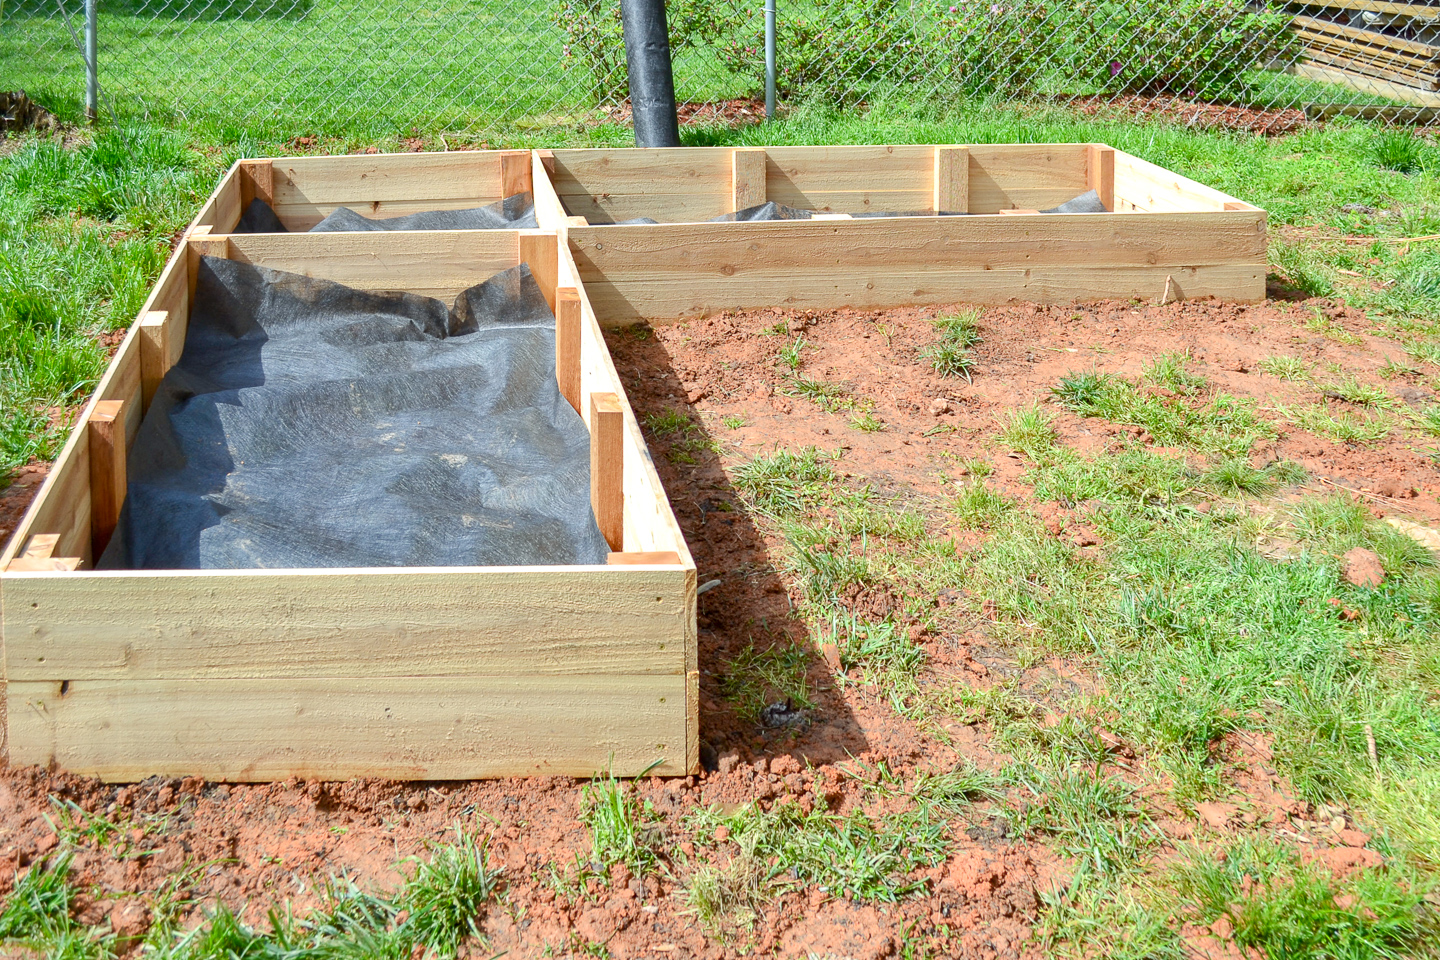
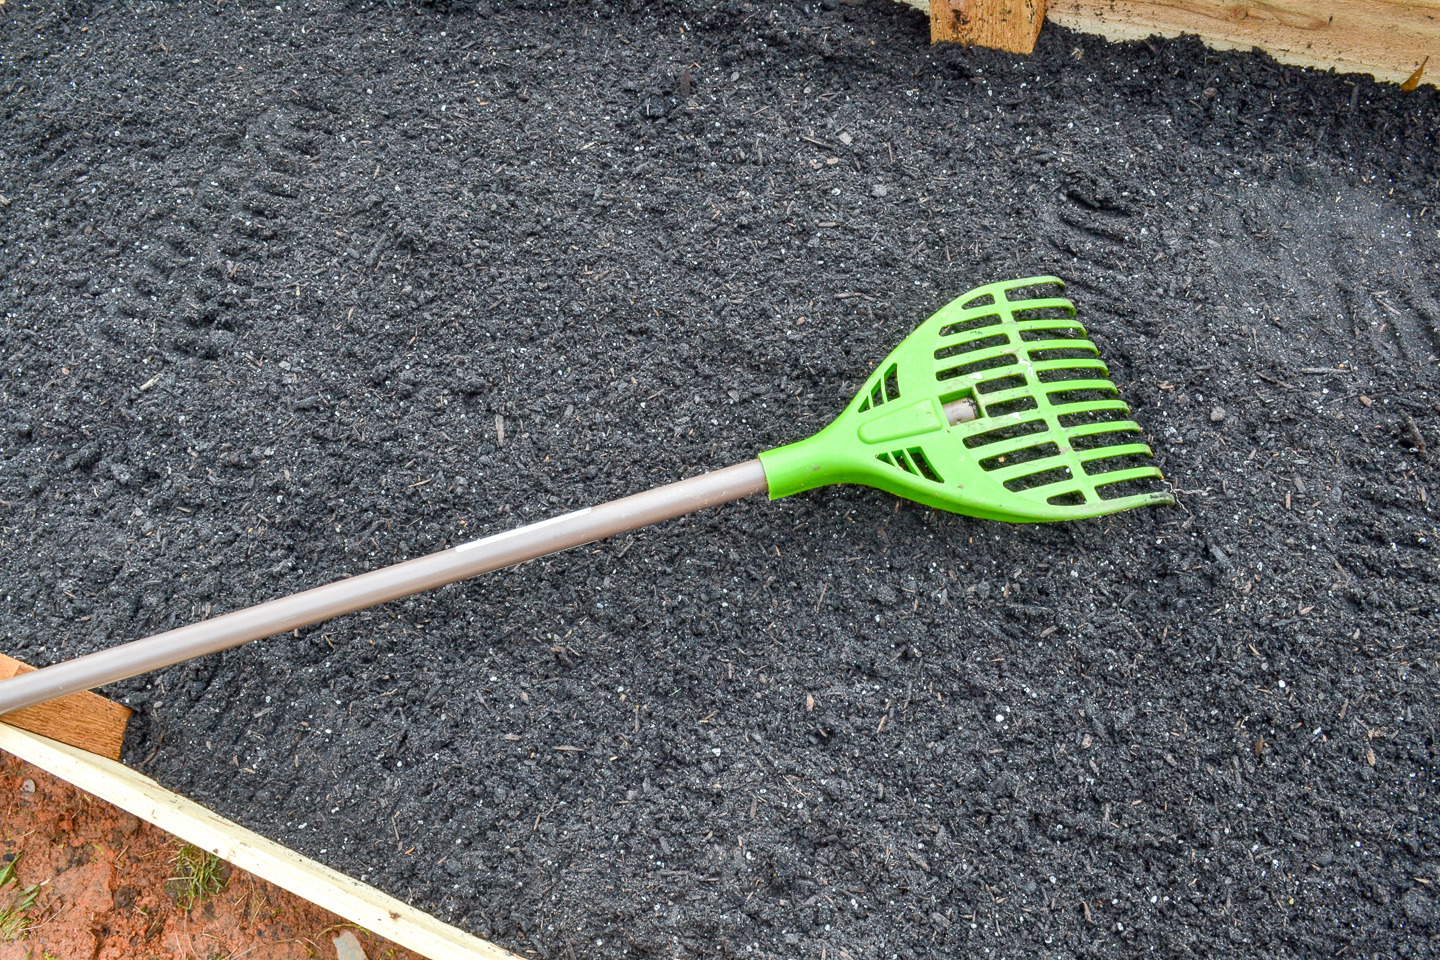
Then, I began layering in organic material, similar to how I layered in the raised garden beds for my gardenias. This “lasagna” method helps to get a good layer of weed-blocking matter toward the bottom, and then compost on top. K and I have been putting in a lot of effort to save our veggies as we cook and put them in a compost pile (which, coughcough, I need to build into a more practical compost setup so it’s more contained, but it’s not really a priority right now).
Lesson learned: you need a LOT of compost, even for tiny gardens!
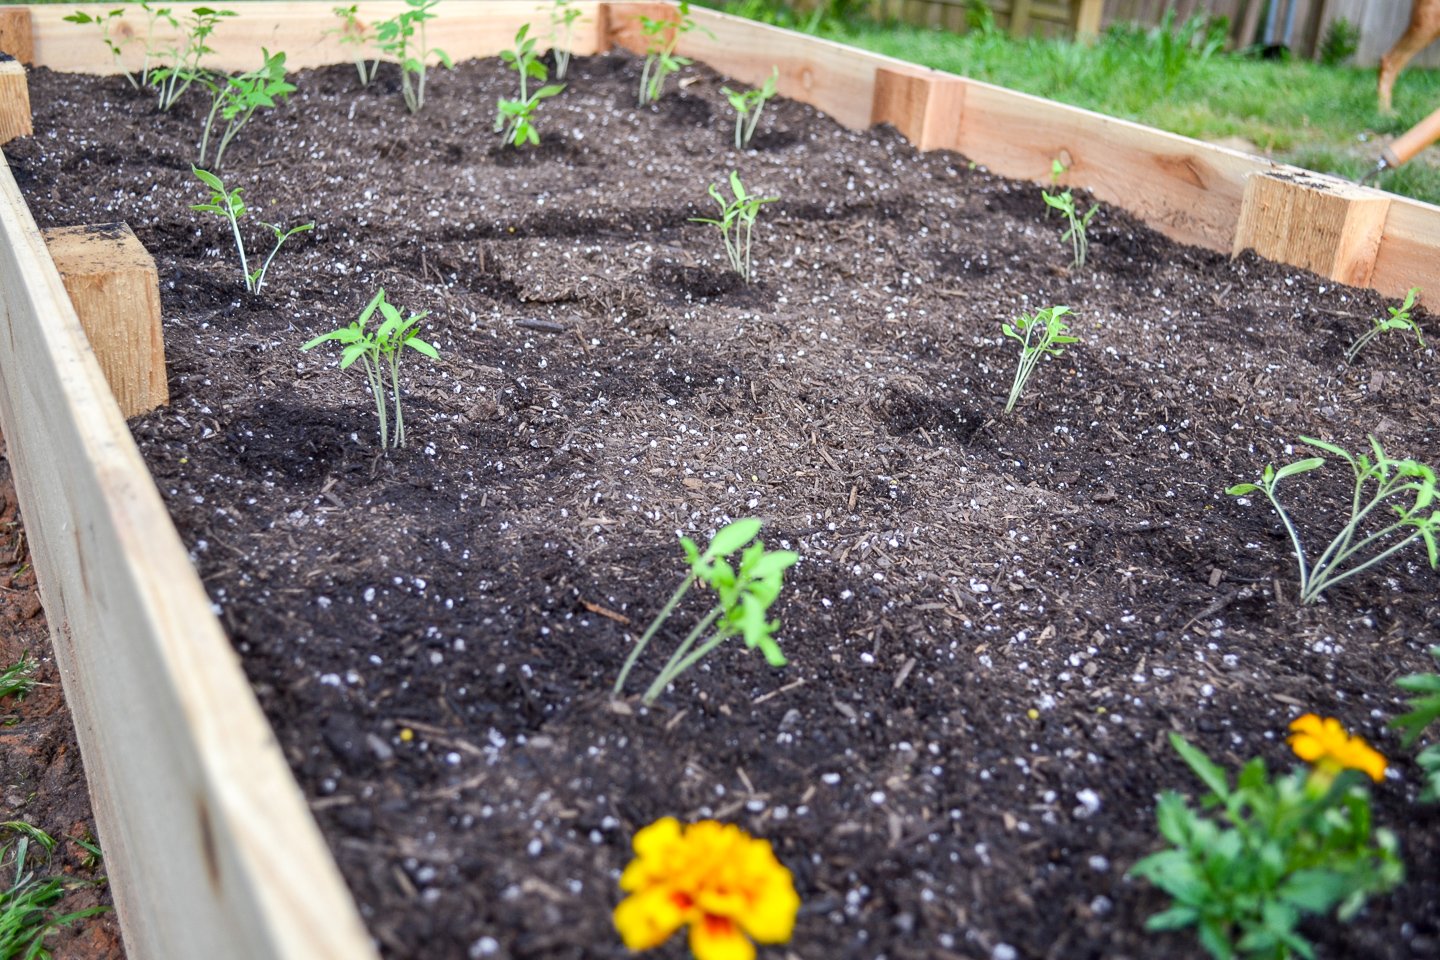
After a trip to the supplier for more composted soil, the beds were ready for the seedlings.
Hey, that’s me! I know it’s kinda narcissistic, but I really like that having K around has meant more photos of me actually doing things here on the blog. Bothering with tripods and timers is a pain in the ass to remember… so for many years, I’ve mostly done without being present in my tutorials. But, I also think that makes things a little more impersonal. “No more disembodied hand tutorials” is a new goal. 

At least, not just hands … 


But anyway, isn’t she pretty? The garden is such a fun new thing to have! I’ll be posting the first few veggies as soon as they are ripe enough to try. This one side has mostly tomatoes, and I planted marigolds because I read they are a natural companion plant that helps repel garden pests (I do think I should add more though)…
And the other has mostly peppers…
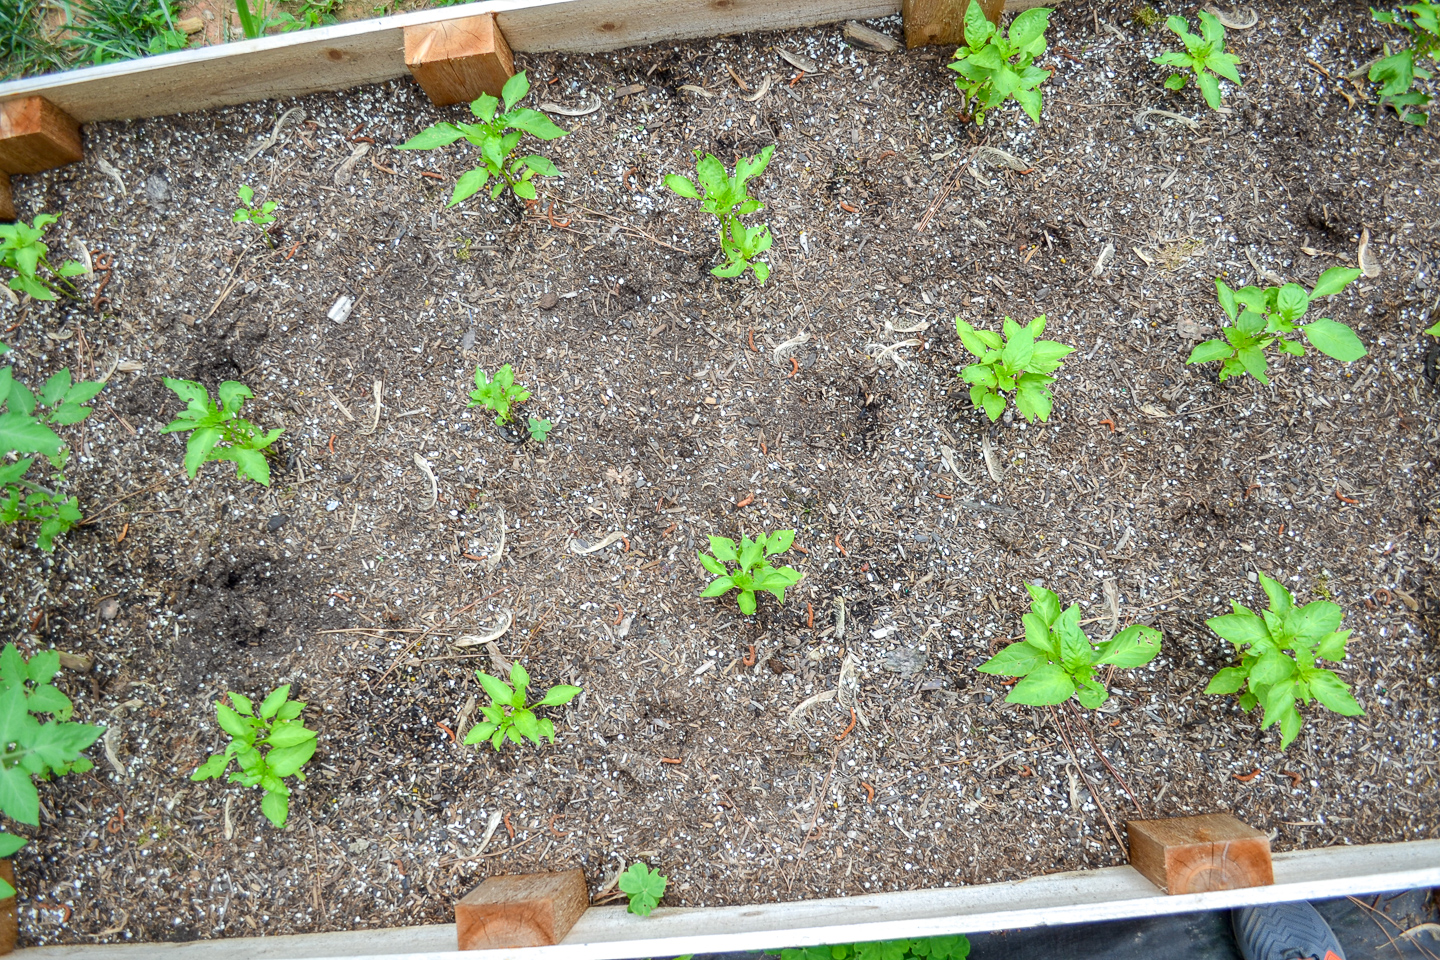
There are also onions and carrots that have just recently started popping up, so there will be lots of new pics for the next garden update.
I wound up building another, skinnier bed for cucumbers with a trellis… which was a little tougher since the landscape in that spot still has roots from the tree removal. If anyone is struggling with that and would like a separate tutorial with some tips on getting a garden bed to work (somewhat) level on an uneven landscape, please let me know!

Spoilers!

Ready for some sneak peeks of things? As I mentioned, this new garden has been in place for a couple of months now, and nearly everything around the bed has been changing. So, that means from just about every photographic angle, there are some crazy updates going on right next to this that I haven’t shared fully yet.

There are a ton of things coming this month, and it’s full-steam ahead with lots of building (which is how we’ve gotten into this pattern of no updates, then a giant swarm of them, and then another quiet period while I continue building… I think a nap is in my future). The new deck is now done, so I have at a minimum of two more posts coming for that. The pub shed, as you can see, is underway, and we’ve been grilling out every night for the last week. It’s a lot. A lot of a lot.


At the end, I’m hoping to also give you guys an update on the travel trailer (it has a name, I’m trying to come up with a pretty piece of art for its new name, and we should be starting on the restoration — coughcough gut job — very soon!).
My vegetable garden also has a small little deck thanks to some extra decking materials left over. It’s been great during these crazy rain storms this spring. I’ll have a separate tutorial for you on that (should be by next Thursday)!

Anyway, that’s what’s going on around here in a nutshell. What have you been building/growing/DIYing lately?
The post DIY L-Shaped Garden Bed (& Vegetable Garden Update) appeared first on Ugly Duckling House.


No comments:
Post a Comment