This post is part of a 3-part series for creating, sealing, and framing custom artwork. Catch part 1 — my painting tutorial — here. Today, I’m sealing my art with epoxy resin to get a clear, gallery-worthy finish that protects!
Hey, friends! Back at this DIY thing today with part 2 of my starry night mountain painting. If you missed part 1 where I showed you how to create easy custom art with acrylic paints (and get that fun starry sky look), jump to that tutorial here. For part 2, I’m sealing the entire piece with art-safe resin and sharing how to get a gorgeous, glossy finish! The whole point of this step is that it protects the art underneath from dust and grime, but I also love this step in the process because it uses FIRE.

I don’t want to jump into that without explaining the beginning first, so let’s start with the basics:
Why seal art with resin?
When it comes to art, most people are familiar with the concept of framing art with glass or plexiglass on top. And if you want to stick with what you know (snore), I suppose that’s fine.  But, I like creating a lot of my own art. I’ve been hearing a lot about resin projects from woodworkers and crafters, so I wanted to give it a try on one of my own pieces.
When I found out that there was one specially formulated to help seal and protect art, I knew this would be a perfect beginner’s project to introduce me to the world of epoxy resin. You know how that goes — find a new thing to play around with, do one, then about 100 more!

I was given this sample of product after attending a woodworking show a couple of weeks ago (thank you to Peter Brown!), but it’s the same kind of thing you’d find at the craft store (just in a smaller sample size). The product is self-leveling, non-yellowing, and non-toxic. It also happened to be one ounce over the amount I’d calculated for my project, so it seemed meant to be!
Materials needed:
contains affiliate links
- cardboard box (large enough to have a safe distance on all sides when elevated — Charlie’s food delivery boxes were perfect)
- plastic lining (garbage bags will probably work fine if you can’t find plastic around the home, but spin around in your house 3 times and I bet you’ll find plastic you’re not using!)
- paint pyramids (4 lids of all the same height, such as spray paint can tops, would also work, but I highly recommend these — they are inexpensive and I use them ALL the time!)
- painter’s tape or masking tape
- disposable mixing cup (these have markings to measure as you mix)
- jumbo craft sticks (I had small dinky ones but larger is better)
- Bernzomatic ST2200T Butane Micro Torch
- disposable gloves
- clear gloss epoxy resin

How to seal art with resin
Set out all supplies and make sure you have everything you need. Once you start mixing, there’s no going back, so prep, prep, prep!
Step 1: set up your project box
Line the cardboard box with plastic liner and place on a level surface. Tape the plastic to the sides so that it won’t move around during your project. Add paint pyramids to the middle to support the art as it cures.

Step 2: place art on paint pyramids
Check that the art piece is level (the resin is self-leveling, so you don’t want the piece leaning or pooling resin in one spot). Make sure there is adequate space to move around as you pour and that the box can close without coming into contact with the canvas as it cures.

Step 3: Mix, using a timer
If you aren’t sure how much resin you’ll need, here’s a handy calculator. Epoxy resin comes in two parts which have to be mixed together in a 1:1 ratio — for every ounce of one part, one ounce of the other is needed. I mixed a total of four ounces for my 10×10 canvas even though I calculated that I would only need 3. I was glad to have extra, since I was worried as I poured that it wouldn’t be enough!
Put on gloves and pour the contents into the same cup. Stir vigorously for 3 minutes. And by 3 minutes, I mean THREE. WHOLE. MINUTES. Undermixing can lead to funky results, so set a timer to make sure you are thorough and ready to pour (I used my cell phone). Don’t be surprised if it starts to feel a little warm (it’s a chemical reaction).
Step 4: Pour and spread
Everything mixed? Good! Take a deep breath, and go for it! Pour the entire contents on the surface and begin spreading things around.

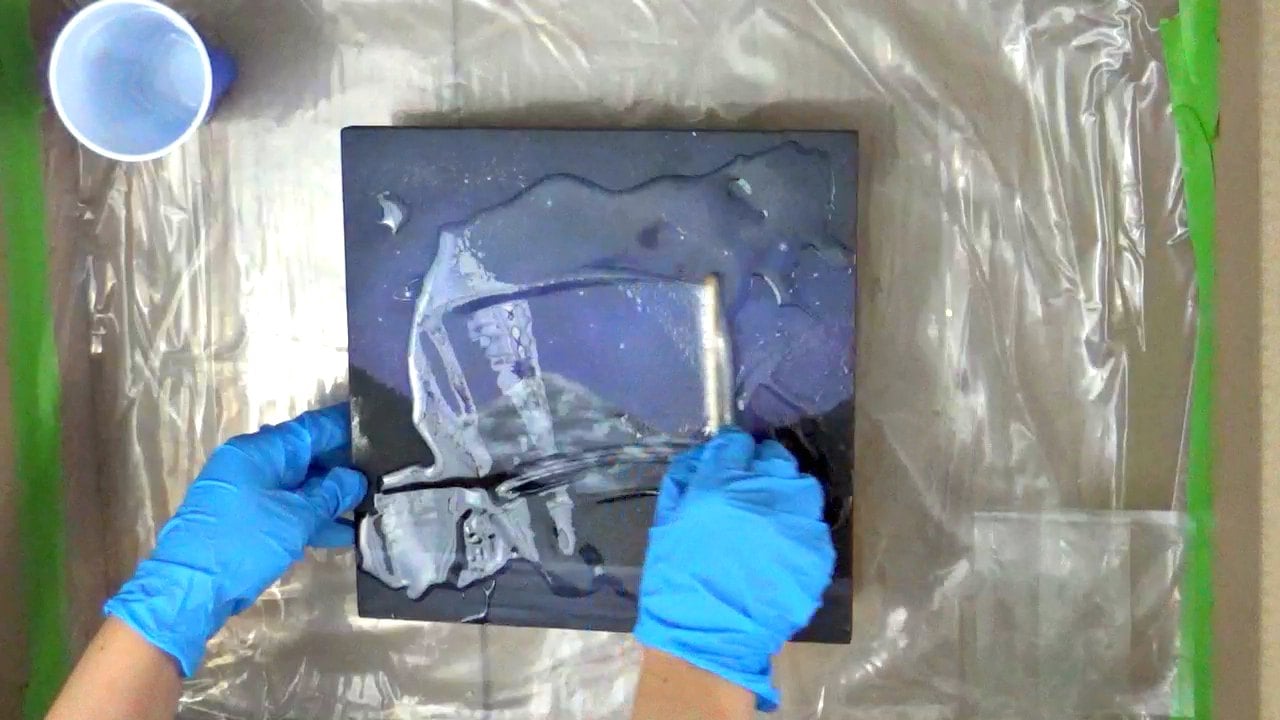
Don’t freak out if it looks kind of blobby or full of air bubbles — you’ll fix that next. Also pay attention to the sides of your piece and spread it along there (you’ll probably see it start to drip in thicker areas). You have about 45 minutes total to mess with your piece before it starts to cure.

Step 5: Pop air bubbles for a high gloss finish
According to the instructions on the resin package, you can “blow” on the surface to get air bubbles out. But when I mixed, I got a LOT of bubbles, which you can see here.

I also half-suspect that if I’d attempted to just blow on the surface, I inevitably would have gotten a stray hair stuck in the goo. A micro torch was not only more effective, but more fun!

I lit the torch and ran it over the entire surface, checking the light at different angles to make sure I could see what was left.
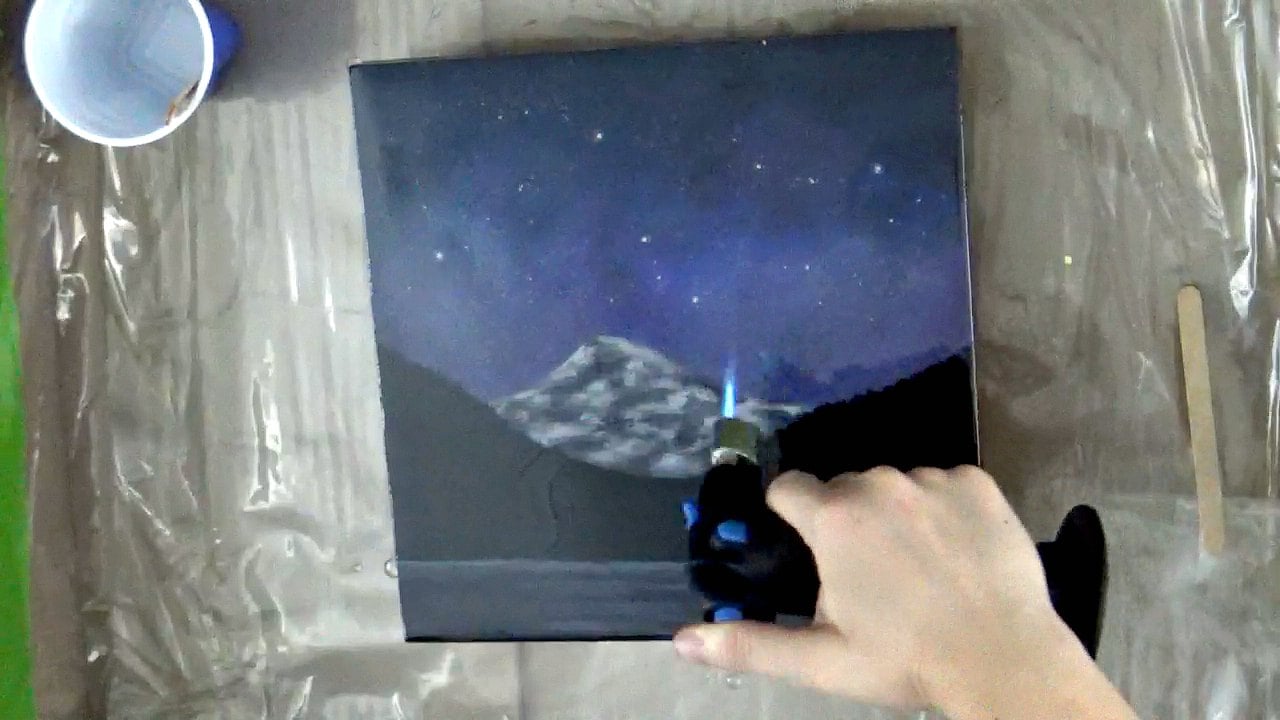
I’m partnering with Bernzomatic on several projects this year, so this seemed like a perfect opportunity to try out one of the items in the Torch Bearer’s kit that they sent. This little micro torch made quick work of getting every last bubble in the resin’s surface, leaving behind a smooth, glass-like finish. It was a lot of fun to witness and really upped the cool factor in this project. If you were hoping for my usual science-y tidbit, then what it’s doing is changing the viscosity of the resin; it frees the trapped air bubbles from their sticky little prisons and creates less resistance, allowing them to rise and pop. Fun, eh?
I didn’t really get perfect photos of the torch part with my camera (understandably, I was much more concerned with perfecting the finished result), so I’ll be posting a video to YouTube soon if you want to see some of that in action! Still, you can see a considerable difference between the photos above and the ones below — the brush strokes of the painting are all that’s left!


Sooooo satisfying… and look how vivid the colors appear after the resin went on!

Step 6: Cover and let cure
Fold the flaps of the cardboard box on top of the art piece. Be careful to avoid anything touching or resting on the interior of the box. Remove gloves and drape more plastic on top if needed (my box had a seam, so I thought it better safe than sorry). The box will protect the resin from dust and hair (coughcough dog hair) as the resin cures, which can be about 24 hours. I chose to do this project just as I was leaving town for a few days; plenty of cure time.

Step 7: Unwrap and enjoy!
Once I flew back home, I took out my new art piece and immediately placed it with other art on the picture ledges in the guest bedroom.

I also briefly placed it on a nail in the hallway to see how it might look when it’s hanging up. I think it still needs a frame before it can go on the wall permanently. The resin will protect my art for years to come and doesn’t require glass on top, so the frame is what I’ll be addressing in part 3 of this series. Be on the lookout for that soon!

What do you think of this epoxy resin idea? Have you ever used it yourself? I’ve seen art videos where people actually mix paints and all sorts of other materials into the resin and pour it onto a canvas or pour it into a mold, creating beautiful swirls of color. Perhaps I’ll have to try those ideas too!
Disclosure: This is a sponsored post for Bernzomatic. As a Bernzomatic Torch Bearer, I was provided complimentary torches and was compensated for my time and efforts. I was not told what to write. All opinions are my own. I am very picky about the brands I work with, and loved working on this project!
The post How to Seal Art with Resin & Get a High Gloss Finish appeared first on Ugly Duckling House.


No comments:
Post a Comment