Hi friends! And hi to new friends visiting from the #CreativeChristmas Challenge hosted by Remodelaholic!
To those of you who don’t know me yet: welcome. Everyone else has already started drinking and saying really embarrassing things (about themselves, not you… we’re not a super judgmental bunch). To those of you who already know me: cheers. As always, you rock. And I was just kidding about the drinking thing (unless it’s football season and a Saturday, which yes to both).
Anyway, from time to time, I like to throw my hat in on a DIY challenge or two because nothing excuses buying more power tools like overcommitting to a deadline for fun (like the 2×4 summer challenge and boom: new coffee table!). This time around, the theme was making something for Christmas. I’ve already been finding inspiration for my color scheme this year in the form of acorns, snowflakes, owls, and other wintery-woodland things, so I figured: why not see if I can fill up the inevitable empty parts of my tree with what I have on hand, rather than buying a bunch of new ornaments? I also just happened upon a set of carving bits for my Dremel and have been itching to experiment with epoxy/inlays/resins, so I started playing around until this happened:

And as a fun little bonus: I actually made a video of it too!
Tools and Materials
affiliate links of items I recommend and use are listed in this post, which support this site at no cost to you… thanks!
- scrap wood (I had 1″ x 4″ poplar)
- scissors
- printer paper
- inkjet printer
- acetone or nail polish remover
- Dremel 200
- Dremel engraving/carving kit
- band saw or scroll saw
- random orbit sander
- wood stain (I used Minwax Ipswich Pine and washed while it was still wet with Early American… I’ll have to show you guys more about this as I’ve done it a number of times to get the colors I like)
- Mod Podge
- small detail paint brush
- Miss Mustard Seed’s German Glass Glitter in Silver Tiara
- Martha Stewart Crafts extra fine glitter in Smoky Quartz
- clear spray sealer (gloss)
- small drill bit
- thread (I used stuff from my cross stitch stash)
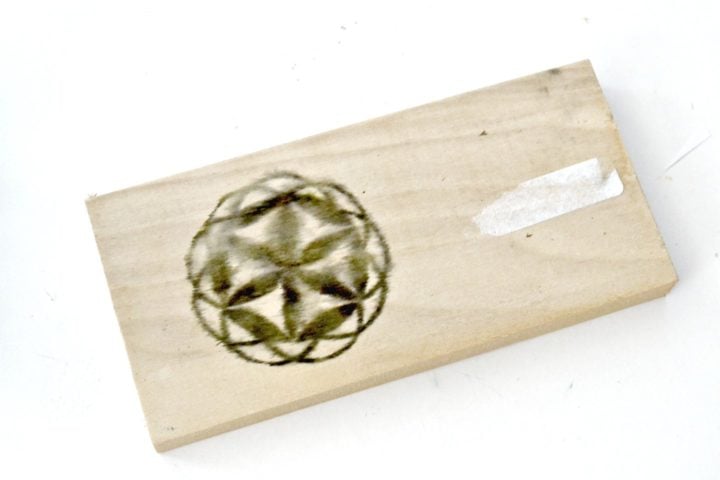
First things first: print out the image (mine is available for download near the end of the post) and cut it out. I used a scrap piece of poplar that was bound for the burn pile, so I wasn’t really expecting perfection (in fact as you can see, I first used a different image that was WAY too intricate for a first-time experiment and then decided on the final design).

To transfer the ink from the printer paper, I swabbed the back with an acetone nail polish remover. As you can see, the image didn’t transfer perfectly, but it was good enough (I got the idea from my buddy Brad’s video here — then went with the option that wouldn’t require changing out of my pajama pants or going into the cold garage that morning).

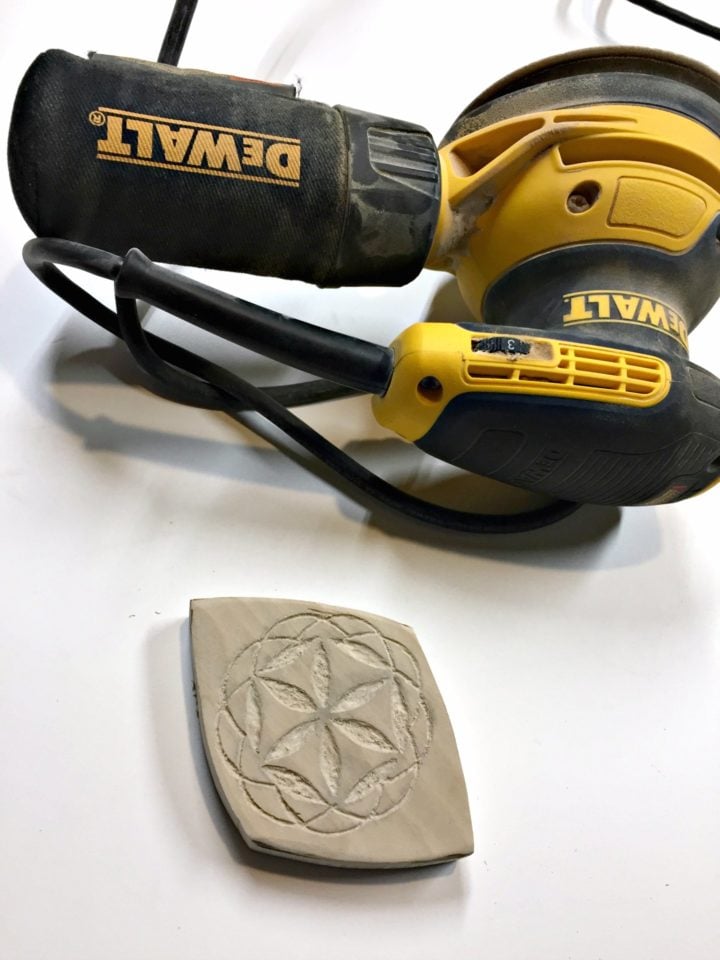
Next, I took out my Dremel and a new engraving/carving set I’d recently purchased for another inlay project. In my opinion, crafting is a good intro before graduating to larger pieces, so I figured this would help me practice with diamond tips, how to control the carve, etc. A good method is to create the hard outline first, then carve out the middle, and continue to make the inlay deeper and deeper until it’s got enough depth to hold the inlay material (glitter, epoxy I assume, whatever).

Next, I sketched out the overall shape (spoiler: it wasn’t at all even, so I highly recommend using the template) and then went to cut out the piece. And this is when it seemed like things were conspiring against me: my new scroll saw was broken… right out of the box. Womp, womp.
To make the situation a little stickier, I was about 5 hours away at this point from needing to head out of town to Raleigh, NC (recap here), and I had no other tools that would give me the right depth and shape. Disappointed but undeterred, I figured the next best thing would be to ask to borrow tools from the person I’d be visiting (thankfully, it was a trip to visit some DIY blogging friends just for fun — my pal Brittany just so happened to have a band saw in her garage). Of course, now I want one of those, too.

Of course, I’d never actually used a band saw before, so despite the general don’t-cut-your-fingers-off rule, the piece still came out a little wonky (mostly due to my non-templating sketch). I was able to shape it a little more with an orbital sander. I also carved the edges out a little more and did a final sanding with high grit sandpaper before stain.

Since the overall concept was to make this look like an inlay, I wanted to use glitter with a little more grit and sparkle: enter, German glass glitter. It’s really amazing stuff in person. To paint it into place, I relied on a small paint brush (tip: if the brush starts to fray a little, spin it as you’re dipping it into the glue to get the point fine again… check out my video to see a demo of that).
You can layer the glitter in, too: after giving it some time to dry, paint another bit of glue on top of the glitter and add more into the recessed areas. It will add depth!

I added extra-fine gold glitter around the edge and sealed the whole thing with a clear gloss spray, then drilled a hole through the top and threaded it so it could hang on the tree.


Caveat: before I sealed with a clear gloss, I actually tried to seal with an old polycrylic which unfortunately made the top and bottom tips look faded/cloudy once it dried. At first I thought I’d lean into the mistake by painting the back and sides with chalk paint and sanding to make it look rustic, but it looked really sad instead and totally detracted from the sparkle on the front. I wanted to get this done in time for the blog hop, so I just continued on with sealing again and adding the glitter around the edge. So, if you try a project like this, don’t make my mistake and you’ll get even better results!

You can also try other inlay methods, other glitter colors, fill in the center vs the outer rings with opposite hues, etc… the possibilities are pretty endless!

All in all, I think it’s going to make a nice addition to my white/gold/chrome/woodland Christmas decor theme this year (and the less I need to spend on ornaments, the more budget I have to make Christmas cocktails, hehe).
Want to try this for yourself? You can download my template here.
To be perfectly frank, I think the photos really don’t do the sparkle on this piece enough justice (in fact, I worried that it was looking too drab in photos). So, I made a video tutorial too (I’d love it if you subscribed if you haven’t already… with what I’ve learned in making this tutorial, there is more to come no doubt!).
As I mentioned, this DIY was part of a blog hop, with 25 other bloggers participating — aka, enough DIY Christmas ideas to keep you busy right up until the actual holiday (if you were so ambitiously inclined). So, check out a preview of the other projects and bloggers participating in the images below. You can also head over to the Remodelaholic post (who is hosting this hop) to check out other DIYers submitting their inspired ideas (on social media, you can look for #CreativeChristmas to find them all).

DIY Christmas Trees and Ornaments
Wintry Silver Dollar Store Christmas Tree Decor | Remodelaholic
Marbled Christmas Ornaments | Doodlecraft
Scrap Wood Inlay Ornaments | The Ugly Duckling House (you’re here!)
Woodburned Wood Slice Ornaments | Sisters What
Flocked Pine Cones | Practical and Pretty
Abstract Monogram Ornaments | Domicile37
Concrete Christmas Ornaments | The Palette Muse
Wood Slice Deer Ornaments | Our Crafty Mom
Vintage Gumball Machine Ornaments | Beth Watson Design Studio
Etched Glass Ornaments | Just Call Me Homegirl
Unicorn Inspired Christmas Tree | The DIY Mommy
Driftwood Reindeer Ornaments | Sustain My Craft Habit

DIY Christmas Gifts and Decor
Christmas Pine Hoop Wreath | This Mama’s Dance
Gingerbread Man Candles | Nourish and Nestle
Wire and Glass Chandelier | Home with Cupcakes and Crinoline
Christmas Scroll Wall Art | Grace In My Space
Lighted Wood Trees | Frazzled Joy
Crocheted Christmas Hat | Luz Patterns
Christmas Card Photo Display| Hertoolbelt
JOY Porch Sign | Ginger Snap Crafts
Folding Bar Cart Table | Everyday Party Magazine
Wood and Burlap Christmas Sign | Leap of Faith Crafting
Wood Block Snowman | Anika’s DIY Life
Holiday Candle Wrap | Dragonfly & Lily Pads
Christmas Pom Pom Pillow | Small Home Soul
Handlettered Wall Art | Smiling Colors
Those of us who did videos for this hop can be found in the playlist below, so those of you who would rather watch than read (or just want to blow off work for a few more minutes) have something, too! *If you’re having difficulty playing it, you can jump over to the playlist here.*
There you have it! Hope you’re getting into the holiday spirit just in time. Will you be working on any decor ideas this Christmas? This is going to be a very busy holiday season for me, so be sure to check back in for more DIYs (I’m going to give that epoxy inlay idea a shot, and a few more scrap ideas are just bubbling in the ol’ brain). Have a great weekend!
The post Wood Inlay Ornament with German Glass Glitter appeared first on The Ugly Duckling House.
Website // Subscribe // Advertise // Twitter // Facebook // Google+
No comments:
Post a Comment